A dependable raised bed soil mix recipe with exact ratios, volume math, ingredient guidance, and practical tweaks for vegetables, plus what to avoid so beds ...
Veg Loom
October 17, 2026
By Maggie O'Connell
Automated Drip Irrigation for Raised Beds
Set up an automated drip irrigation system for raised beds with a timer, filter, pressure regulator, and drip lines. Includes a simple design plan, parts list, capacity tips, and troubleshooting for vegetables.

Maggie O'Connell
Maggie O'Connell is a lifelong gardener and the voice behind Vegloom, dedicated to helping people grow their own food regardless of their yard size. With over 15 years of hands-on experience in backyard agriculture, she specializes in raised bed gardening, organic soil building, and seasonal planting calendars. When she isn't writing, Maggie can usually be found tending to her sprawling heirloom tomatoes or experimenting with new compost recipes.
If you have ever stood in the yard with a hose thinking, “I will water for five minutes” and then lost half an hour (and your patience), you are going to love drip irrigation. It is one of those garden upgrades that feels fancy, but it is really just a few simple parts working together. The payoff is huge: steadier moisture, healthier roots, fewer disease issues from wet leaves, and way less water wasted on paths and weeds.
This guide walks you through designing and installing an automated drip system for raised beds that keeps vegetables thriving even when life gets busy.
Why drip beats hand-watering for vegetables
- Deep, steady moisture: Drip delivers water slowly so it soaks in instead of running off.
- Fewer foliar diseases: Water goes to the soil, not the leaves (hello, happier tomatoes and cucumbers).
- Fewer weeds: You are not watering the entire bed surface, especially paths and bed edges.
- Water efficiency: Much less evaporation than sprinklers, especially in summer.
- Consistency: Plants hate big swings from bone-dry to soaked. Timed drip keeps moisture even.
Pick your system style: soaker, dripline, or emitters
There are three common ways to drip irrigate raised beds. Any of them can work. The best choice depends on what you grow and how your beds are laid out.
Option A: Inline dripline (my favorite for mixed veggies)
This is flexible tubing with emitters built in every 6, 9, 12, or 18 inches. It is easy to snake through beds and water rows evenly.
- Best for: rows of greens, carrots, onions, bush beans, mixed plantings
- Pros: even watering, tidy, easy to expand
- Watch for: choose emitter spacing that matches your plant spacing
Option B: Drip emitters on 1/4-inch tubing (best for big, spaced plants)
You run a main line, then use 1/4-inch tubing to deliver water to individual plants with button emitters.
- Best for: tomatoes, peppers, eggplants, squash, cucumbers on a trellis
- Pros: highly targeted, easy to give thirsty plants more
- Watch for: more connections means more potential leaks
Option C: Soaker hose (simple, but less precise)
Soaker hose can work in raised beds, but quality varies and it is harder to control output evenly.
- Best for: quick-and-simple setups, long narrow beds
- Pros: minimal parts
- Watch for: uneven soaking, clogs, and pressure issues
If you are brand new, inline dripline plus a good timer is the sweet spot.
Parts you need (and what each one does)
Think of a drip system like a tiny plumbing project. Once you know the job of each piece, it stops feeling intimidating.
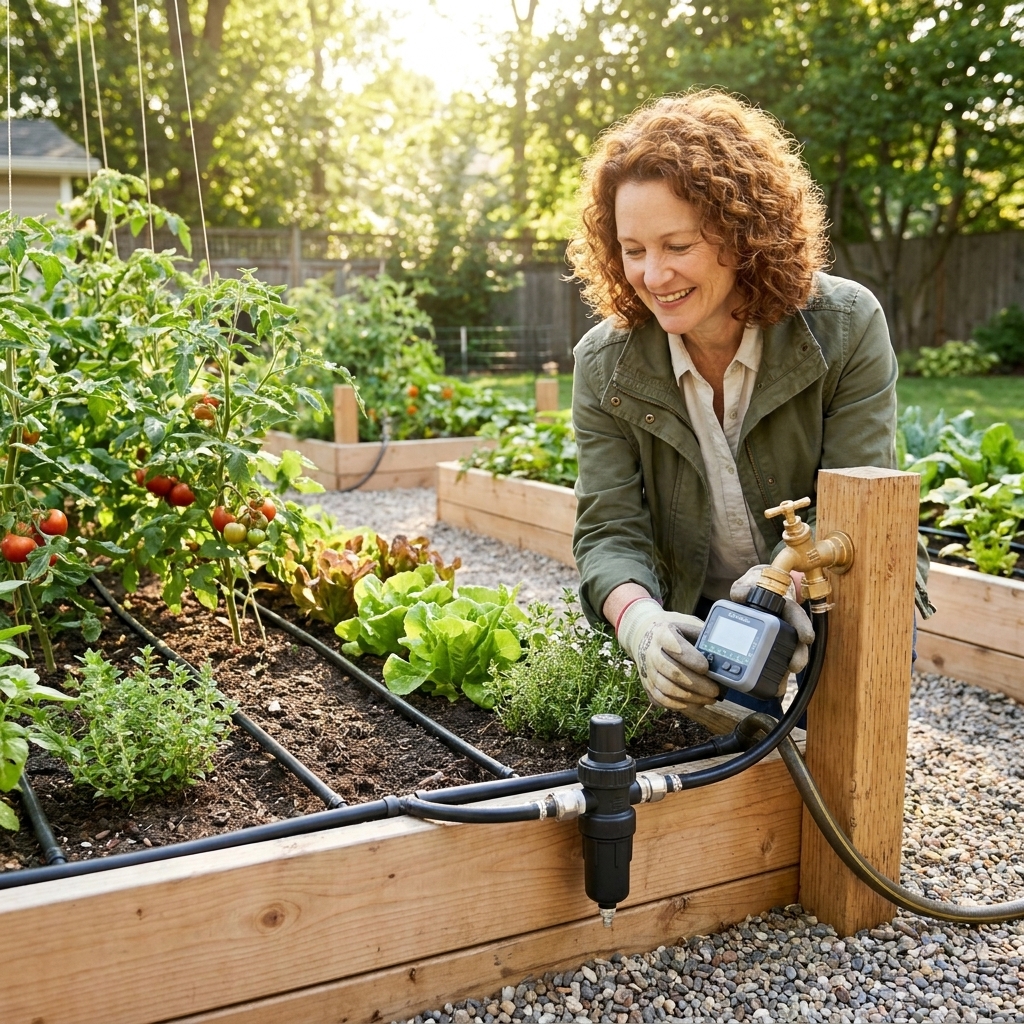
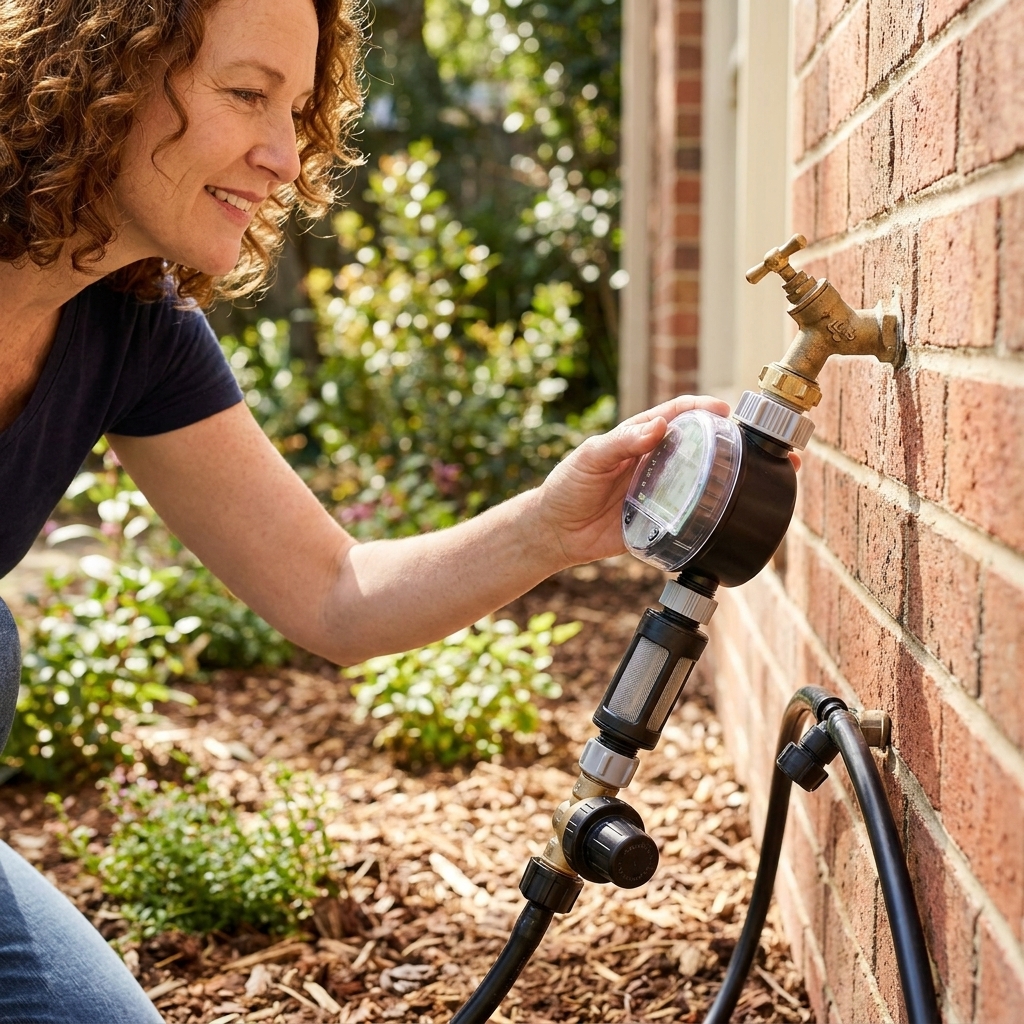
- Hose bib timer: automates watering. Choose a model with multiple start times and adjustable run minutes.
- Backflow preventer: keeps garden water from siphoning back into household plumbing. Some timers include this, but many setups still use a separate one. Local codes vary, so check what is required in your area.
- Filter (often 150 to 200 mesh): prevents grit from clogging emitters. Match the mesh rating to what your dripline or emitters recommend.
- Pressure regulator: drip parts often run best in the 15 to 30 PSI range, but it depends on the product (drip tape and some soakers like lower pressure, many driplines are happy around 25 PSI). Check your tubing and emitter specs.
- Mainline tubing: often 1/2-inch poly tubing that carries water to your beds.
- Distribution tubing: 1/4-inch tubing or inline dripline that actually waters plants.
- Fittings: tees, elbows, couplers, end caps, and figure-8 ends.
- Hole punch: makes clean holes in the 1/2-inch mainline for barbed fittings.
- Stakes or hold-downs: keep lines in place so they do not shift while you weed.
- Optional: hose splitter, extra valves, flush valves, pressure gauge, fertilizer injector (only if you really want to dial it in).
Raised-bed reality check: If you are on well water, ditch water, or you have lots of sediment, do not skip the filter. Clogs are the number one drip heartbreak.
Design your layout before you buy everything
Give yourself ten minutes with a notebook and you will save an hour of redoing connections later.
Step 1: Measure beds and count zones
A “zone” is anything that gets watered on one timer program. If all your raised beds sit together and have similar watering needs, one zone is fine. If you grow thirsty cucumbers next to drought-tolerant herbs, it is worth separating.
Step 2: Decide how water will enter each bed
- From one side: simplest. Run mainline along one edge and branch into beds.
- Loop around beds: more even pressure in larger setups. Great when you have several beds in a row.
Step 3: Choose dripline spacing inside the bed
For most vegetable raised beds, I aim for lines spaced 8 to 12 inches apart. That keeps the entire root zone evenly moist without overwatering the paths.
- 4-foot-wide bed: typically 4 to 6 lines of dripline if spaced 8 to 12 inches.
- 3-foot-wide bed: typically 3 to 4 lines.
- 2-foot-wide bed: typically 2 lines.
If you are using individual emitters for large plants, plan for one to two emitters per plant to start, then adjust.
Step 4: Match emitter flow to your soil
Raised beds usually have lighter, well-drained soil than native clay, which means water moves down faster. Common inline dripline options are 0.5 GPH or 1.0 GPH emitters. As a general starting point:
- Sandy or very fluffy mixes: 0.5 GPH, run a bit longer
- Loam or compost-rich mixes: 0.5 to 1.0 GPH
- Heavier raised-bed soil that holds water: 0.5 GPH, shorter runs
You can make almost any flow rate work with the right run time. Consistency matters more than “perfect” numbers.
Step 5: Check capacity and decide if you need more zones
This is the unglamorous step that saves a lot of head-scratching later. Every emitter is a tiny faucet. Too many tiny faucets on one line can mean weak flow at the far end.
- Estimate your total flow: Count your emitters and multiply by the emitter rate. Example: 120 emitters at 0.5 GPH is about 60 GPH total.
- For inline dripline: Figure out how many emitters you have per line by dividing line length by emitter spacing. Example: 8 feet of dripline with 12-inch spacing has about 8 emitters.
- If flow seems weak: Split into two zones, shorten runs, or loop the mainline so pressure stays more even.
Timers and hose-bib parts vary a lot in how much water they can pass. If your system looks great on paper but the far end is barely dripping, zoning is usually the fix.
Installation: step-by-step
I like to assemble everything on a dry day when I can take my time. Put on gloves if you have tender hands. Poly tubing can be stubborn when it is cool outside.
1) Build the faucet stack
At the spigot, connect in this order:
- backflow preventer (if separate)
- timer
- filter
- pressure regulator
- hose-to-mainline adapter (to connect to 1/2-inch poly tubing)
Hand-tight is usually enough. If you use thread tape, wrap it neatly and avoid over-tightening plastic parts.
2) Run the 1/2-inch mainline to your beds
Lay the tubing along the bed edges or down a central path. Leave a little slack for shifting soil, weeding, and the occasional “oops” with a shovel.
3) Branch into each bed
Use a tee or elbow fitting to bring water into the bed. Then either:
- run 1/2-inch poly around the perimeter and punch in 1/4-inch lines, or
- connect your inline dripline directly with a 1/2-inch to dripline fitting
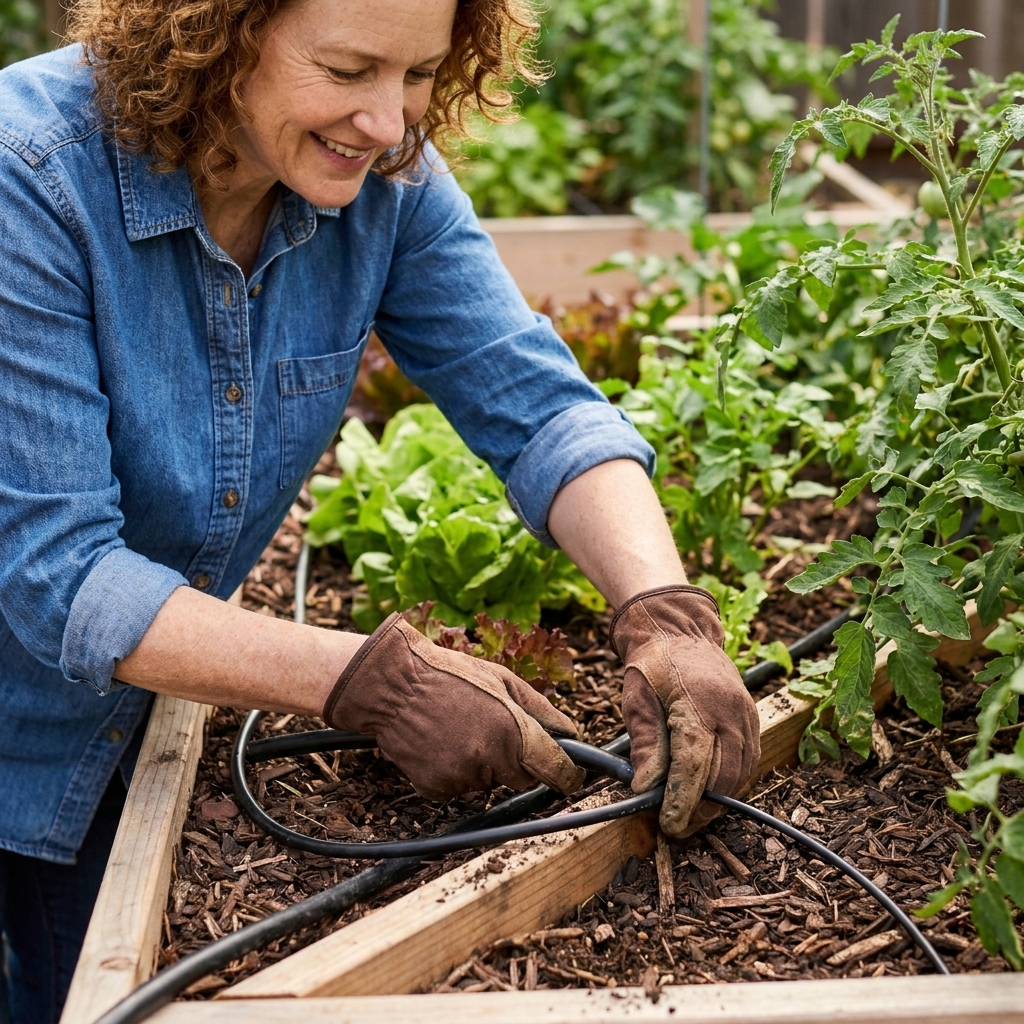
4) Lay dripline in the bed
Snake lines back and forth across the bed, keeping spacing consistent. Stake it down every couple of feet so it stays put when you harvest and weed.
Tip from my own mistakes: Keep driplines a few inches away from the wooden bed sides. Otherwise, the edges can stay constantly wet, which can shorten the life of untreated wood. In very organic, consistently damp mixes, that kind of moisture can also encourage fungus gnats (they are usually more of a “too wet” clue than a crisis).
5) Cap the ends and add a flush point
Cap the end of each line with an end cap or a figure-8 end. If you can, set up at least one easy flush point at the end of the mainline. Flushing is how you kick out little bits of grit before they clog emitters.
6) Test for leaks and even flow
Turn the system on and walk the whole layout. Look for:
- spraying connections (push fittings in firmly)
- kinks in 1/4-inch tubing
- dry sections (a sign of a closed end, kink, or blocked emitter)
Let it run 5 to 10 minutes the first time, then fix leaks and re-test.
Programming the timer: run time and frequency
This is the part everyone wants a magic answer for, and I get it. But watering needs depend on heat, wind, plant size, soil mix, and how much your bed is mulched.
It also depends on your setup, including how many drip lines you have per bed, your emitter flow rate, and emitter spacing. Two gardens can run the same “30 minutes” and deliver very different amounts of water.
Here is a practical starting point that works for many raised-bed vegetable gardens with dripline (0.5 to 1.0 GPH emitters), then you adjust based on what the soil actually feels like.
Good starter schedules
- Spring (mild temps): 2 to 3 times per week, 20 to 35 minutes
- Early summer: 3 to 5 times per week, 25 to 45 minutes
- Peak summer heat: 5 to 7 times per week, 30 to 60 minutes (often better early morning)
- Fall: taper back as temperatures drop, 1 to 3 times per week
New transplants: For the first week, I often do shorter, more frequent runs to help roots settle in, then shift toward deeper watering.
How to tell if it is right
- Check soil 2 to 4 inches down near a plant. It should feel cool and lightly moist, like a wrung-out sponge.
- If the top looks wet but it is dry below, run longer.
- If soil feels soggy or you see algae or fungus gnats, run shorter or less often.
If you mulch your beds with shredded leaves or straw, you will likely be able to water less often. Mulch is basically a drip system’s best friend.
Simple example layouts
One 4x8 raised bed (mixed vegetables)
- Mainline runs along the long side of the bed.
- Four to six runs of inline dripline across the width, spaced 8 to 12 inches apart.
- Ends capped on the far side, with stakes every 2 to 3 feet.
Three beds in a row with a path between
- Mainline runs down the path.
- A tee branches into each bed.
- Each bed has its own set of driplines, capped at ends.
- Optional: add a simple shutoff valve at each bed so you can turn one off if it is empty or newly seeded.
Tomatoes and peppers bed
- Mainline feeds 1/4-inch tubing to each plant.
- Start with one 1 GPH emitter per plant, then add a second emitter mid-summer if plants need more.
- Keep emitters a few inches away from the stem to encourage roots to spread.
Common problems (and quick fixes)
Some plants look thirsty even though the system runs
- Check for a kink or crushed line.
- Make sure an end cap did not pop off and dump pressure.
- Confirm emitter spacing lines up with the crop row.
- Run time may be too short for your soil mix.
Clogged emitters
- Add or upgrade the filter.
- Flush mainline and driplines every couple of weeks early on, then monthly once things are clean.
- If you have hard water, occasional mineral buildup can happen. Soaking removable emitters in vinegar can help.
Uneven watering across long runs
- Keep zone lengths reasonable.
- Use 1/2-inch mainline to deliver water, then branch into 1/4-inch close to the bed.
- Consider looping the mainline so pressure stays more even.
- If it is still uneven, split the area into two zones.
Water puddling at the soil surface
- Soil might be compacted. Loosen gently and add compost.
- Swap to lower-flow emitters (0.5 GPH) or run shorter cycles.
- Mulch helps reduce surface sealing and improves infiltration.
Critters chewing lines
It happens. Squirrels and rodents sometimes test-drink tubing. Keep repairs easy: store a few couplers and extra tubing so you can patch in minutes. If it is frequent, try burying mainline slightly in paths or covering with mulch.
Seasonal care and winterizing
Drip systems last much longer with a little routine care.
- Monthly: flush the ends of lines and clean the filter screen.
- Mid-season: walk the system while it runs and fix small leaks before they become big ones.
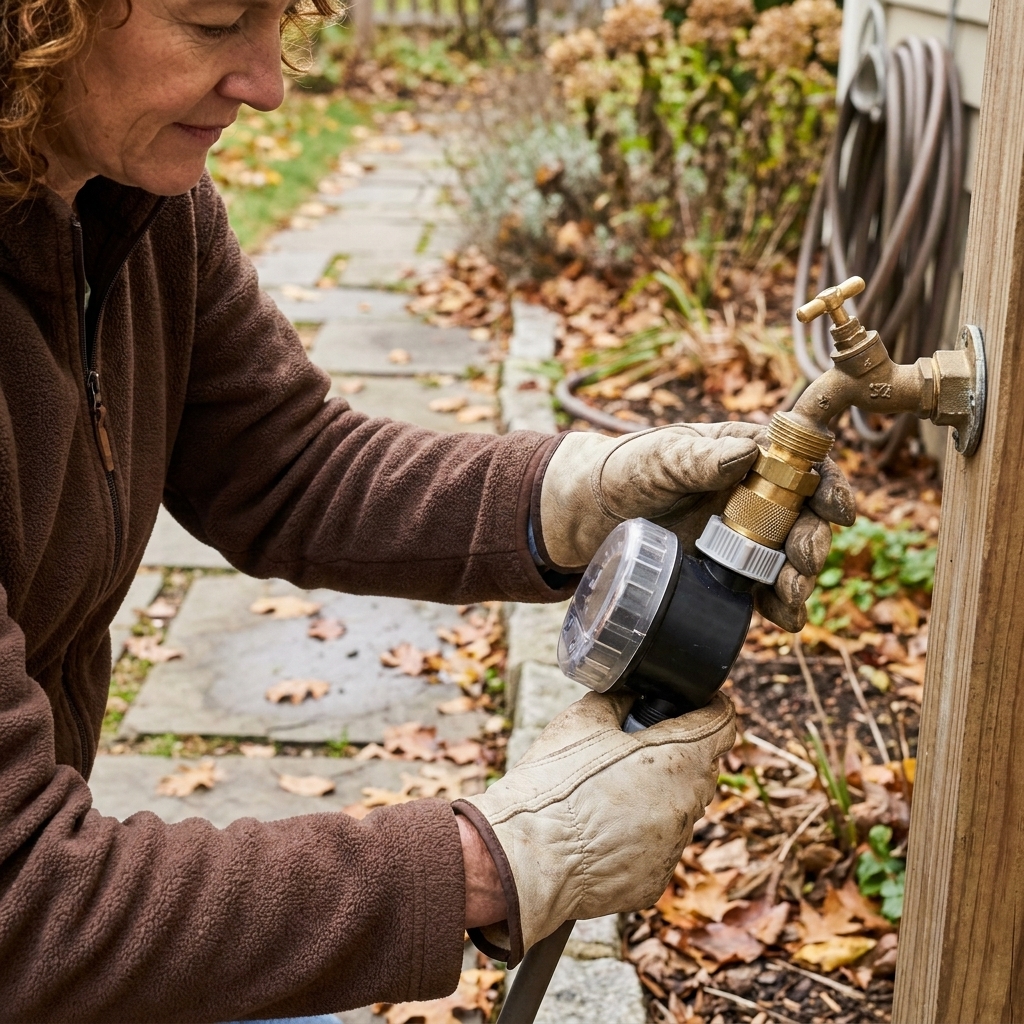
- Before first freeze: disconnect the timer, filter, and pressure regulator. Drain them and store indoors if your winters freeze hard.
- In spring: reconnect, flush lines, then run a test cycle before planting day.
FAQ
Do I need a pressure regulator for drip irrigation?
Almost always, yes. Household water pressure can blow fittings off or cause uneven output. Most garden drip parts are designed to run at lower pressure, often somewhere around 15 to 30 PSI. Check the specs for your dripline, drip tape, or emitters and match the regulator to that.
Is it better to water daily or a few times a week?
For established vegetables, deeper watering less often is usually better than frequent shallow watering. In peak heat or in very fast-draining raised-bed mixes, daily watering can be appropriate. Let the soil moisture 2 to 4 inches down be your guide.
Can I run drip under mulch?
Yes, and I recommend it. Put dripline on the soil surface, then mulch over it. You will reduce evaporation and keep hoses out of the sun, which extends their life. I avoid burying it deep in the soil because it makes it harder to spot clogs, leaks, or chewed spots.
Will drip work with rain barrels?
Sometimes. Gravity-fed rain barrels often do not provide enough pressure for standard dripline emitters. You may need a pump or a gravity-rated system designed for low pressure.
How do I know if I am overwatering?
Yellowing leaves, slow growth, fungus gnats, algae on the soil surface, or consistently soggy soil are common clues. Reduce run time or frequency and check drainage.
A quick pep talk before you start
Your first drip setup does not have to be perfect. Mine certainly was not. I had a line that watered the path like it was a prized zucchini plant and a fitting that popped off exactly once, right when I had company in the yard. The good news is that drip systems are wonderfully forgiving. You can add, adjust, and improve as you learn what your beds and your climate want.
Once you have a timer handling the routine watering, you get to spend your garden time on the fun stuff: planting, pruning, harvesting, and sneaking cherry tomatoes right off the vine.